With ASP.NET 1.x, you had to take care of the interaction between users and your custom user management all by yourself. Now there is good news ahead! With the new version, you'll get support from a couple of web controls:
Login provides a login form that you can use as is or adapt by using styles. You can even design it to suit your needs with a template.
PasswordRecovery is adaptable in a similar way and allows you to reset and/or send a password that was forgotten.
LoginStatus provides a Login or Logout link depending on the actual status of authentication.
LoginName outputs the login name.
LoginView handles an expandable set of templates. Whether these are shown depends on the authentication status or the assigned roles of the user.
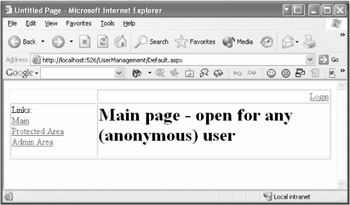
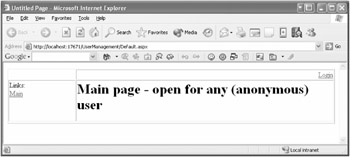
I've adapted the previously shown structure for the use of Master Pages to provide a good basis for further examples. All of the three pages you've seen so far are based on this template. The Master Page consists of a table with a ContentPlaceHolder control, three links, and a LoginName and LoginStatus control in the upper-right side. In combination with a single content page, default.aspx from the root directory of the application, the entire page now looks as shown in Figure 6-7. As you can see, the Login link button appears in the upper-right side.
The Login control has one simple task: It takes data from a user who isn't authenticated yet, makes a validation, and depending on that validation, confirms the authentication or denies it.
I've created a new page, login.aspx, in the root area of the application to demonstrate the control. As in previous versions, one page with this name is used by default to log on the user. This page is also shown if users try to access a page for which they have to be authenticated, for example. Naturally, the created page uses the previously defined Master Page. In addition, I've included the Login control (see Listing 6-1).
<%@ page language="C#" master="~/MasterPage.master" %>

<asp:content id="Content1"
    contentplaceholderid="ContentPlaceHolder1" runat="server">

    <asp:login id="Login1" runat="server"
        font-names="Verdana"
        font-size="10pt"
        borderwidth="1px"
        bordercolor="#999999"
        borderstyle="Solid"
        backcolor="#FFFFCC"

        instructiontext="Please enter your user name and password to log in"
        remembermeset="True"
    >

        <titletextstyle font-bold="True" forecolor="#FFFFFF" backcolor="#333399">
        </titletextstyle>
    </asp:login>

</asp:content>
Through the Task List, the control offers the option Auto Format, with which you can choose between various standard formats, similar to other controls. I decided to go for Classic for this example.
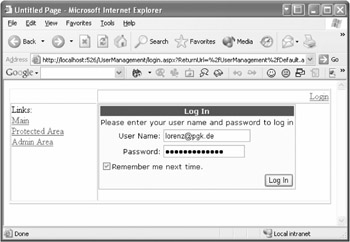
This control offers real Plug and Play capability. If you've been following along with this example, and you start your web site and click the Login link button, you can already start using the control to log in. Using the correct user data, you get access to the protected pages (see Figure 6-8). Check it out!
You can adapt your Login control to make it unique to your site, not like login features on other web sites. A whole range of different formatting properties and styles is at your service for this purpose. The Submit button, for example, can be defined either as a regular button, a link button, or an image button. Additionally, you can define whether the input fields should be displayed horizontally or vertically and whether the text should be shown above or beside the fields. Naturally, you may adapt all the text, for example, to localize it.
Functional changes are possible without any difficulty. Using the DisplayRememberMe property, you can define whether the possibility of a permanent login should be offered to the user via a CheckBox control. With RememberMeSet, you can define the initial value of the CheckBox control. The behavior in the case of errors and many other situations may be handled individually.
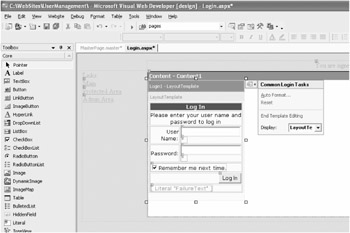
If these options are not enough for you to make the modifications you desire, you can use templates instead, an example of which is shown in Figure 6-9. You can avoid a lot of manual work by converting the actual configured state with the help of the Task List into a template, and then working on the template afterward. The functionality of the control stays as it is, as long as you haven't changed the defined IDs of the controls.
It is obvious that using a template results in more source code. It's getting much clearer, however, how the control is working on the inside. Listing 6-2 offers a snippet.
<%@ page language="C#" master="~/MasterPage.master" %>
<script runat="server" language="c#">

</script>

<asp:content id="Content1"
    contentplaceholderid="ContentPlaceHolder1" runat="server">
    <asp:login id="Login1" runat="server"
        ...
        >

        <layouttemplate>
            <table style="FONT-SIZE: 10pt; FONT-FAMILY: Verdana" border="0">
                ...
                <tr>
                    <td align="right">User Name:</td>
                    <td>
                        <asp:textbox id="UserName" runat="server">
                        </asp:textbox>
                        <asp:requiredfieldvalidator
                            id="UserNameRequired" runat="server"
                            errormessage="User Name."
                            validationgroup="Content1$Login1_Group"
                            controltovalidate="UserName">
                                *
                            </asp:requiredfieldvalidator>
                    </td>
                </tr>
                ...
                <tr>
                    <td align="right" colspan="2">
                        <asp:button id="Button" runat="server"
                            validationgroup="Content1$Login1_Group" text="Log In"
                            commandname="Submit" />
                    </td>
                </tr>
                <tr>
                    <td style="COLOR: red" colspan="2">
                        <asp:literal id="FailureText" runat="server">
                        </asp:literal>
                    </td>
                </tr>
            </table>
        </layouttemplate>
    </asp:login>
</asp:content>
The Login control offers four events by which you can interact with the Login process:
BeforeLogin is raised before the authentication takes place. Here you have the capability to check the syntax of the created data, for example, and stop the login if necessary.
AfterLogin will be raised after successful authentication and will allow you to pass through additional routines—for example, to load individual user data or to record the login.
Authenticate can be used whenever you want to provide a customized authentication. With the help of the event arguments, you can specify whether or not the checking of user data has been successful. Normally, however, you'll implement your own mechanism for the authentication by an individual membership provider.
LoginError is raised when the authentication stops and the user data is incorrect.
One would think that users could remember their passwords. The reality, however, can be quite different! That's why it really makes sense to offer a specific control to determine forgotten passwords. Such a control exists and has the name PasswordRecovery.
The control helps users to determine their forgotten passwords. First users must enter their login name. Then the question that was typed in with the entry is shown. If they give the correct answer, their existing password will be mailed to the specified address or a new password will be created. The latter is necessary if a hash value has been stored in the database instead of the password in the form of text, and for that a recovery of the original password is impossible. This shows that the behavior of the control is changing according to the settings you've made during setup of Membership Management.
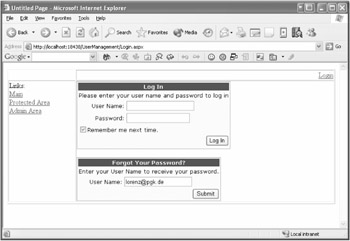
I've placed the control on the formerly shown login page so that you can see it in action in Listing 6-3. It really makes sense to place both controls on the same page, as shown in Figure 6-10. Alternatively, you may as well create a new page and link it with the help of a template-based Login control.
<asp:passwordrecovery id="PasswordRecovery1"
    runat="server" font-names="Verdana"
    font-size="10pt"
    bordercolor="#999999"
    borderwidth="1px"
    borderstyle="Solid"
    backcolor="#FFFFCC">

    <titletextstyle font-bold="True"
        forecolor="White" backcolor="#333399">
    </titletextstyle>

    <maildefinition from="lorenz@pgk.de">
    </maildefinition>
</asp:passwordrecovery>
If you want the control to do its job, you must enable it to send e-mails. Therefore, the following configuration is placed in the machine.config as a standard. If you've installed and activated a local SMTP service, you can leave the setting untouched. If you are using a different mail server, however, you can overwrite the data in the local web.config file.
<smtpMail
   serverName="localhost"
   serverPort="25">
/>
Additionally, you must edit the data of the password message to be sent. In the best-case scenario, it will do to assign the From property of the MailDefinition subobject to a sender's address. Here, the control will use the standard e-mail template. The result looks more or less like this:
From: <lorenz@pgk.de>
Subject: Password
To: <lorenz@pgk.de>

Please return to the site and log in using the following information.
User Name: lorenz@pgk.de
Password: 6BR7afTDcl
The e-mail doesn't look really smart yet, so you may want to make individual changes to the template. Using several properties of the MailDefinition class, you may also define a couple of things apart from the sender's address: Should a carbon copy of the e-mail be sent? Which format is going to be used (text or HTML)? Do you want to set a subject and a priority?
The option to create a message based completely upon a template is very useful. Just create a new text file in the root directory of the application and name it, for example, PasswordRecovery.txt. Now you place the desired e-mail text in the file, but without the heading lines. Then you use <%UserName%> and <%Password%> as placeholders for the username and the password. A simple template might look like this:
In order to use the template, you must assign the PasswordRecovery control's MailDefinition.BodyFileName property to the filename you've chosen.
PasswordRecovery is quite similar to the previously mentioned Login control and can be adapted thoroughly as well. Here, a couple of Style properties are at your service, and all the text can be adapted, of course.
The control offers three different templates that you can build up completely from scratch or use on the basis of the already integrated views:
UserName is the initial view of the control, and it asks the user to type in a user name, that is, the login name.
Question is used if the user must answer a question to get to the password.
Answer is shown if the password has been detected successfully or has been set back and e-mailed to the user.
The PasswordRecovery control implements a couple of events that you may handle to step through the control's cycle:
BeforeUserLookup: Is raised before the control tries to find out the user account belonging to the specified name. You have the option to use individual tests and to cancel the process.
UserLookupError: Allows you to stop the cycle in case the entered user name can't be validated.
BeforeAnswerLookup: Is used before the answer entered by the user is checked. You may cancel this operation within the scope of the event.
AnswerLookupError: Is raised if the entered answer isn't correct.
BeforeSendMail: Is raised before an e-mail is sent to the user. With the help of the event arguments, you get access to the instance of the MailMessage class that is based on the template mentioned earlier. This way you can modify the message and add more data if desired.
LoginStatus and LoginName, though rather unspectacular, are nevertheless two quite useful controls.
LoginName shows the name of registered users regardless of which provider they were authenticated by. With the FormatString property, you have the capability to add a format description. If a user isn't authenticated, the control will not create any output to the page.
In the simplest case, LoginStatus shows either a login or a logout link, depending on the status of the authentication. With the help of various properties, both texts can be changed individually. Alternatively, you may add pictures to this control to correspond to login and logout states, similar to what is done with .NET Passport.
As you can see in the following code, I've placed both controls, LoginName and LoginStatus, on the top-right side of the Master Page so that they can be used automatically on each single page.
<td>
    <p align="right">
        <asp:loginname id="LoginName1"
            runat="server"
            formatstring="You are signed in as: {0}">
        </asp:loginname>
        <asp:loginstatus id="LoginStatus1" runat="server">
        </asp:loginstatus>
    </p>
</td>
The Login link of the LoginStatus control automatically refers to the page that is placed in the configuration (by the standard login.aspx page). You can specify a logout page, if desired, to be shown after the logout. With the LogoutAction enumerations property, you may also define whether another page will be shown after logout or if the current one will be updated.
Like the LoginStatus control, which has two different views depending on the authentication process, the LoginView control itself offers automatic changeover. Here, however, you may define the shown elements individually with the help of two templates. The application for this control is in the area of conditional display of pages for anonymous and for authenticated users.
Previously, I adapted the existing Master Page a little bit to demonstrate the details. I've a feeling, however, that it isn't really ideal to display the links to the two protected areas to anonymous users. You can avoid this by using the new LoginView control as shown in Listing 6-4.
<asp:loginview id="LoginView1" runat="server">
    <anonymoustemplate>
        Links:<br />
        <asp:hyperlink runat="server"
            navigateurl="~/Default.aspx">
            Main
        </asp:hyperlink>
    </anonymoustemplate>
    <loggedintemplate>
        Links:<br />
        <asp:hyperlink runat="server"
            navigateurl="~/Default.aspx">
            Main
        </asp:hyperlink><br />

        <asp:hyperlink runat="server"
            navigateurl="~/ProtectedArea/Default.aspx">
            Protected Area
        </asp:hyperlink><br />

        <asp:hyperlink runat="server"
            navigateurl="~/AdminArea/Default.aspx">
            Admin Area
        </asp:hyperlink>
    </loggedintemplate>
</asp:loginview>
As you can see, two templates have been assigned to the control. Following a main behavior of the control, only one of the two templates is shown. That is why the link to the starting page is repeated in the second template. Alternatively, this link could be placed outside of the control. Figure 6-11 shows the view for anonymous (that is, unauthenticated) users.
Unfortunately, the approach shown previously has one small issue. As soon as a user logs in, that user will see all the links, even those to the admin area. In reality, only a small number of people will have the right to access the administration. In cases like this one, the LoginView control enables you to create as many role-based templates as you want, and they will be displayed depending on the roles to which the users belong.
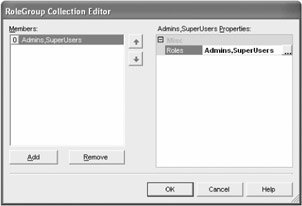
To create a new role-based template, you must select the LoginView control in the Design or Source view and choose the entry RoleGroups from the Properties grid. With the "..." button, you can open the Collection Editor, shown in Figure 6-12, and use it to create new templates based on one or several roles.
Templates created in this way can be edited visually in the Design view and filled with content as usual. With each entry in the source code, a subcontrol of the type RoleGroup will be created, to which a ContentTemplate property will be assigned (see Listing 6-5).
<asp:loginview id="LoginView1" runat="server">
    <anonymoustemplate>
        Links:<br />
        <asp:hyperlink runat="server"
            navigateurl="~/Default.aspx">
            Main
        </asp:hyperlink>
    </anonymoustemplate>
    <rolegroups>
        <asp:rolegroup roles="Admins,SuperUsers">
            <contenttemplate>
                Links:
                <br />
                <asp:hyperlink runat="server"
                    navigateurl="~/Default.aspx">
                    Main
                </asp:hyperlink>
                <br />
                <asp:hyperlink runat="server"
                    navigateurl="~/ProtectedArea/Default.aspx">
                    Protected Area
                </asp:hyperlink>
                <br />
                <asp:hyperlink runat="server"
                    navigateurl="~/AdminArea/Default.aspx">
                    Admin Area
                </asp:hyperlink>
            </contenttemplate>
        </asp:rolegroup>
    </rolegroups>
    <loggedintemplate>
        Links:<br />
        <asp:hyperlink runat="server"
            navigateurl="~/Default.aspx">
            Main
        </asp:hyperlink>
        <br />
        <asp:hyperlink runat="server"
            navigateurl="~/ProtectedArea/Default.aspx">
            Protected Area
        </asp:hyperlink>
    </loggedintemplate>
</asp:loginview>
| Note |
Please be aware that only one template is shown at any given time. The control checks the role-based templates first. The first template with a matching role membership gets the award. If none of the groups is suitable, the general LoggedInTemplate property will be used. |
Now, judging by all the controls presented so far, you would logically assume there should be one that allows the independent registration of new users. Such a control is planned but not yet implemented. The Beta version of ASP.NET 2.0 is expected to offer this control. Until then, you can use the Membership Management API to create users as described later in this chapter.
Another control that is planned to be shipped with the Beta version is called ChangePassword; you can probably guess its purpose by its name.