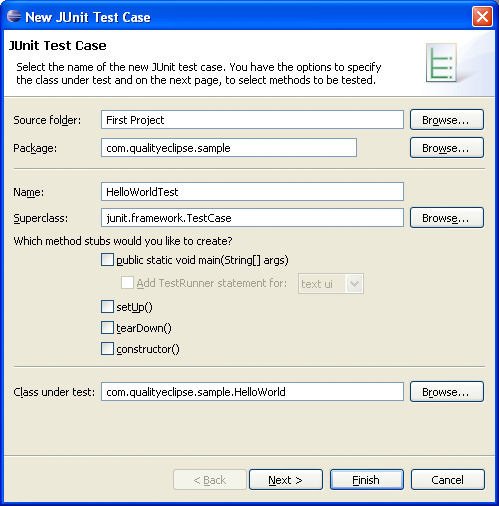
1.11. Introduction to TestingIn addition to manually testing an application by running or debugging it, Eclipse supports the JUnit framework (see www.junit.org) for creating and running repeatable test cases. 1.11.1. Creating test casesTo create a test case, you first need to add the junit.jar file (from the org.junit plug-in) to your project as an external JAR using the Java Build Path > Libraries project property page. Once this is done, select the class for which you want to create a test case, open the New wizard, and select the Java > JUnit > JUnit Test Case option. This invokes the JUnit Test Case wizard (see Figure 1-70), which creates a JUnit test case. If you forget to add the junit.jar to your project, the wizard will do this for you automatically. Figure 1-70. JUnit Test Case wizard.
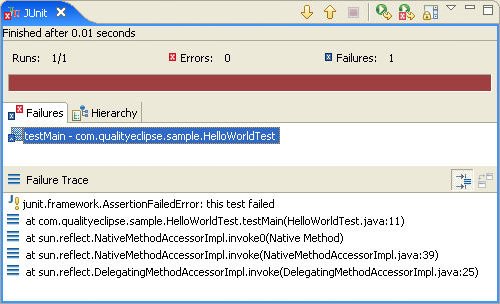
By default, the name of the new test case is the name of the test class with the word "Test" added to the end. Optionally, you can have the wizard create main(), setup(), and teardown() methods as well as test methods for any public or protected method in the test class. Tip CodePro includes a more advanced Test Case wizard that provides a number of enhancements over the Eclipse Test Case wizard, such as the ability to specify arbitrary test cases, generate better default code, and support the creation of test fixtures. 1.11.2. Running test casesAfter a test case is created, select the test case class (or the project or package containing the test case) and then select the Run > Run As > JUnit Test command (Alt+Shift+X, T). This opens the JUnit view (see Figure 1-71), which shows the results of the test run. The Failures tab shows a list of the failures that were recorded in the test case, and the Hierarchy tab shows the entire test suite as a tree. Figure 1-71. JUnit view.
If there are any test failures, correct the problem(s) and rerun the test by clicking on the |