Previous Page
Next Page

Building Three-State Rollovers

A three-state rollover is one where the rollover has three versions. Besides the original image and the version that appears when the user places the cursor over the image, there is a third version of the image when the button itself is clicked, as shown in Figure 4.5.

Figure 4.5. When the button is clicked, you get a third image (hard to see in this grayscale image; check our companion Web site for the full effect).


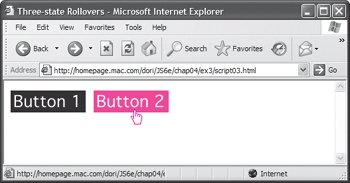
Script 4.4, the HTML file, looks almost exactly the same as Script 4.2 from the previous task. In fact, the only differences are the document's title and the name of the external JavaScript file that is being called. That's it. This is an example of why putting all your JavaScript into an external file is so powerful; you can add functionality to your pages without having to rework your HTML pages.

Script 4.4. By putting your JavaScript in an external file, the HTML for a three-state rollover is virtually identical to a two-state rollover.

<!DOCTYPE html PUBLIC "-//W3C//DTD XHTML 1.0 Transitional//EN">
<html xmlns="http://www.w3.org/1999/xhtml">
<head>
     <title>Three-state Rollovers</title>
     <script src="script03.js" language= "javascript" type="text/javascript"> </script>
</head>
<body bgcolor="#FFFFFF">
     <a href="next1.html"><img src= "images/button1_off.gif" width="113" height="33" 
border="0" alt="button1" id="button1" /></a>&nbsp;&nbsp;
     <a href="next2.html"><img src="images/button2_off.gif" width="113" height="33" 
border="0" alt="button2" id="button2" /></a>
</body>
</html>

In Script 4.5, the external JavaScript file, there are only a few changes from Script 4.3. Rather than go through the whole script again, we'll just focus on the changes. Remember that parts of the script that we're covering are shown in red.

Script 4.5. This script powers the three-state rollover.

window.onload = rolloverInit;

function rolloverInit() {
     for (var i=0; i<document.images.length; i++) {
        if (document.images[i].parentNode. tagName == "A") {
           setupRollover(document.images[i]);
        }
     }
}

function setupRollover(thisImage) {
     thisImage.outImage = new Image();
     thisImage.outImage.src = thisImage.src;
     thisImage.onmouseout = rollOut;

     thisImage.clickImage = new Image();
     thisImage.clickImage.src = "images/" + thisImage.id + "_click.gif";
     thisImage.onclick = rollClick;

     thisImage.overImage = new Image();
     thisImage.overImage.src = "images/" + thisImage.id + "_on.gif";
     thisImage.onmouseover = rollOver;
}

function rollOver() {
     this.src = this.overImage.src;
}

function rollOut() {
     this.src = this.outImage.src;
}

function rollClick() {
     this.src = this.clickImage.src;
}

To build a three-state rollover:

1.
thisImage.clickImage = new Image();
thisImage.clickImage.src = "images/" + thisImage.id + "_click.gif";


In the setupRollover() function, we need to add a third image property, for the click state. In the first line, we create a new image object that will contain the clickImage version of the image. The second line sets the source for clickImage. It builds the name of the source file on the fly, concatenating "images/" with the id of the image, and adding "_click.gif".

2.
thisImage.onclick = rollClick;


This line tells the browser to trigger the rollClick() function when the user clicks the mouse on the image.

3.
function rollClick() {
  this.src = this.clickImage.src;
}


When the user clicks the mouse on the image, this function sets the image source to the clickImage version of the image.


Previous Page
Next Page