You've got the kickstart server set up. You've modified the various ks.cfg files and have ks-server.cfg file and a ks-workstation.cfg files ready to be used remotely. Now let's take a moment and talk about Red Hat's (and now Fedora Core's) standards for client side, kickstart install boot media.
| Caution |
Many people who set up production kickstart servers put the ks.cfg files on the boot media itself. In practice, especially the IT environment, this is begging for trouble. With this setup, every time you make an update to a ks.cfg file, you have to contact everyone in the company and get them to download your latest and greatest boot floppy or boot CD and discard or erase their old boot disks with the old ks.cfg files. In short, it doesn't work, and those old boot floppies just keep popping up and messing things up for everyone. Just take a tip from those who have gone before you and centralize your ks.cfg files-pointing to standardized web reference names (or links) from your modified and automated boot media. The result is that by doing it this way, your "boot media version" is now irrelevant. The only better solution is either a homegrown integrated PXE-LAN environment (diskless kickstarts) OS provisioning system or Red Hat's own Satellite/Provisioning server, which huge provisioning shops like Rackspace might run. For more information on the Red Hat servers, see www.redhat.com/software/rhn/table/#architecture |
Red Hat boot floppies used to be divided into local media boot floppy images called boot.img and network-capable boot images called bootnet.img. These can still be seen in the older (nonenterprise) sections of Red Hat mirror sites such as the one we maintain at Rackspace:
This system was nice, but with all the motherboard chip sets, IDE controllers, and network card drivers, Red Hat quickly ran out of room on that bootnet.img floppy image.
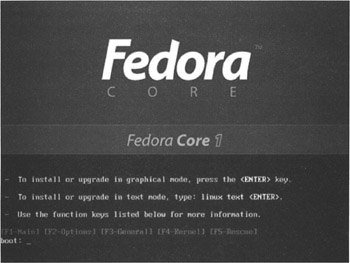
To remedy this, Red Hat now provides only one boot floppy image, called bootdisk.img. It allows for basic local HD- and CD-based installs to IDE drives. For network installs or installs that require network drivers (FTP, HTTP, NFS installs), SCSI/RAID or PCMICA mass storage drivers (that is, any third party drivers), bootdisk.img needs to load the drivers (after booting from bootdisk.img) from either the drvnet.img, drvblock.img, or pcmciadd.img driver disk, respectively. This process can be a nuisance, so Red Hat also has a bootable CD image that has all of these drivers built in. Figure 4-2 shows the boot screen from the bootdisk.img or the boot.iso (CD).
These boot media images are available on all Fedora Core FTP mirror sites as well as on Fedora Core CD 1. See Table 4-1 for a description of what each image does.
|
Media Files |
Description |
|---|---|
|
Bootdisk.img |
Required boot floppy image for Fedora Core installs from CD or hard drive media. Also base boot for network and block device (SCSI/RAID) installs (1.44M). |
|
Drvblock.img |
Supplemental block device drivers such as storage controllers, SCSI, and RAID controllers (1.44M). |
|
Drvnet.img |
Supplemental network device drivers such as NIC (network interface card) drivers (1.44M). |
|
Pcmciadd.img |
Supplemental PCMCIA/PC-Card driver disk (1.44M) |
|
Pxeboot/ |
The directory of files to put on your PXE/DHCP server to allow pure network-based boot and installs (~3-4M) |
|
Boot.iso |
A standalone CD image that includes all the boot and driver info from bootdisk.img, the drvblock.img, drvnet.img, and the pcmpciadd.img floppy images. Good for doing machine boots for single media network installs. |
To get a listing of Fedora Core mirror sites where you can download these boot images, go to http://fedora.redhat.com/download/mirrors.html.
There are three general boot options for performing a network install: floppy disks, CDs, and PXE.
Stock or custom boot floppy network installs: This type of installation uses the bootdisk.img floppy image, along with one to three standard driver disks. These driver disks enable the install time environment to get to network or media that has other install-related files (such as kickstart config files). Within such floppy-based installations you have two alternatives:
Stock: Use the stock bootdisk.img boot floppy image and whichever of the three driver disks you might require (block device driver, network driver, and PCMCIA driver disk images). This method can require manually swapping floppies at least once, so this makes for a poor automated install process. You also have to make your clients manually point the boot/install process to a centralized network share of your kickstart config file(s) where all of your install parameters are defined. This method is very prone to typos and not very user friendly.
Slightly Customized: This method uses the same one to four driver floppies as with the Stock method, but you slightly modify the boot disk to have your boot config file automatically point to the correct network location for the kickstart config file(s). Of the two main forms of floppy installs, this tends to be the more popular since it is more automated.
| Note |
There is a third, less common method that can totally automate the entire install process all from a single boot floppy (with network and other drivers built-in), but it is technically very complex and beyond the scope of this chapter. This is a method by which you can make your own custom, automated, single, hybrid boot/driver floppy with all the drivers that you need. This single boot/install/driver floppy has your own custom initrd (initial RAM disk) file needed to automate everything from a single boot disk. If you don't know what an initrd file is, then you probably don't want to even think about this option. If you're still interested more information on this useful subject can be found at http://linuxcourse.rutgers.edu/bootdisk.html. |
The fact is we are more and more moving away from floppies as a common media, especially for specialized boot environments like kickstart. Some newer laptops no longer come with floppy drives. Keep in mind, however, that if you prefer using floppies, the first of these alternatives is simpler for you (creating the floppies), but more difficult and error prone for the end user doing the install. The second method is probably the way most people should do floppy-based network installs, as it is much easier for the end user, still requires a bit of floppy swapping by the user, but only slight customization on your behalf. Details on the second option are covered in the Creating Customized Boot Floppies section later in the chapter.
| Note |
It should also be noted that while it is considered a technically bad management practice (in an enterprise at least) to put your ks.cfg file(s) on the floppy itself, this is still an option available to you. If you decide to do this, the boot option to point anaconda to the floppy for the ks.cfg file from the boot: prompt is linux ks=floppy. |
Stock or Custom Boot CD: Use the boot.iso CD image, and either have your clients manually point to a centralized HTTP share of your ks.cfg files or make your own slightly customized CD image that totally automates this. Either way, you have a single media network install solution. These procedures are covered in the Making a Network Install Boot CD section.
LAN PXE boot solution: This solution is available only if all of your people have a PXE-capable network card and have the card and machines BIOS set up for PXE network booting. Since most IT administrators do not have access (or clearance) to set up a full PXE boot environment, and since this configuration would also have to be duplicated across all company LANs (since PXE/DHCP/bootp is a LAN broadcast only solution), this solution falls outside the scope of this book. If interested in this option, see www.redhat.com/docs/manuals/enterprise/RHEL-3-Manual/sysadmin-guide/ch-pxe.html.
Given all this, the boot CD seems to be the easiest and more forward-compatible network install option for doing Red Hat Enterprise or Fedora Core kickstart/anaconda installs. Since all CDs and machines are pretty much bootable nowadays, it's usually easier to either use a stock boot.iso boot CD and point it manually to your network-based ks.cfg file(s) or to modify the boot.iso image for automatic kickstarts for fire-and-forget installs. Rebuilding the floppy image with a single disk hybrid OS/kernel/initrd setup is beyond the scope of this chapter, but we give a link to more information on doing this in one of the aforementioned notes. Let's start with the older and more unruly to manage multifloppies method, and then we'll turn to the more elegant modern CDs method.
If you want to do your network-based OS install using the three floppy images, first copy the bootdisk.img, drvnet.img, and drvblock.img, from the CD 1 (in Fedora/images/) or from a mirror site. Then follow these steps:
Write your floppy images out to three blank/formatted disks using dd:
# dd if=bootdisk.img of=/dev/fd0

# dd if=drvnet.img of=/dev/fd0

# dd if=drvblock.img of=/dev/fd0
| Note |
The drvblock floppy is needed only if you're installing to or from mass media storage such as SCSI, RAID, or specialized storage hardware. It's not bad to have, but usually not required on most PCs. |
Insert and mount the bootdisk floppy:
#  mount /dev/fd0 /mnt/floppy/
#  cd /mnt/floppy/
#  ls
boot.msg       initrd.img    options.msg   rescue.msg   splash.lss   vmlinuz
general.msg    ldlinux.sys   param.msg     snake.msg    syslinux.cfg
Now with your new boot floppy mounted, you can start editing and customizing it to point to your kickstart files out on the network.
| Tip |
If you don't want to have to do this every time you want another identical boot disk, then after you work all the bugs out and tweak out your bootdisk just so, you can loopback mount the actual img file as a loopback file system (with the -o loop mount option): cd into /mnt/floppy and edit away on your "phantom floppy" image. Then when you're done: # cd # umount /mnt/floppy and from then on when you dd a copy of the img file to a disk you will have all of your changes! Try doing that on a stock Windows box! |
After mounting your new bootdisk floppy, you need to make some space on the disk by deleting the .msg files:
# /bin/rm *.msg
| Tip |
Keep a few of these .msg files around. These would be handy later when you decide that you want an interactive user menu with directions and help options. |
Now edit the syslinux.cfg file to look like this and add the bold bit (all on one line):
default linux
prompt 1
timeout 1
label linux
kernel vmlinuz
append initrd=initrd.img ramdisk_size=8192
ks=http://example.com/installs/ks-server.cfg
ksdevice=eth0 dd <--- Note
label memtest86
kernel memtest
append -
| Note |
The trailing dd boot option in the isolinux.cfg file has nothing to do with the dd command that we used earlier. The dd boot option is what tells anaconda to ask for the drvnet and/or drvblock driver disks so that it can either get online or install SCSI or RAID card drivers-must in our case since we need the dvrnet disk's network card drivers to get online and our kickstart file! This required "floppy swapping" illustrates how floppy's time has come and gone, and we will see how using the single boot CD boot.iso is a much nicer and more modern option. |
After you're done with your edits, cd back home and unmount the floppy:
  # cd
  # umount /mnt/floppy
Now take your new bootdisk and driver disks to a test machine and see how they work!
A couple things to know about laptops: If you expect to use the PCMCIA or PCCard slots during the install, you will also need the pcmcia.img floppy driver disk (unless you're using the CD boot media, which includes it). If you don't need the PCMCIA hardware during install time, don't worry about it. After the postboot OS downloads kicks in and begins to run, the same Fedora installer that installs from CD will be running, and will detect any supported hardware and install the correct drivers for your machine. pcmcia.img (as well as the other driver disks) is just an install time thing in case you need a PCMCIA network card, external CD-ROM, or SCSI/RAID driver support to gain access to the ks.cfg file and the remaining bootstrap image itself.
This being said, there have been some strange problems with Fedora Core's support of PCMCIA/PC-card controller technology as well as with some older network cards. If you are experiencing similar hardware problems, monitor the buzilla bug lists at https://bugzilla.redhat.com/bugzilla/query.cgi?format=simple.
After going to this URL, just search on the "Product: Fedora Core," "Version: <your version>", and "Component: kernel-pcmcia-cs" for an up-to-date status of these issues. It was still in a state of flux at the time of this writing.
On newer laptops, if you also experience problems with battery monitoring, PCMCIA/PCCard hardware, network service lockups, and other such Laptop-isms, try adding the acpi=on kernel boot option to your grub.conf kernel line (the one below is wrapped):
   title Fedora Core (2.4.22-1.2129.nptl)
           root (hd0,1)
           kernel /vmlinuz-2.4.22-1.2129.nptl ro root=LABEL=/
              hdc=ide-scsi acpi=on
           initrd /initrd-2.4.22-1.2129.nptl.img
Adding the acpi=on will ensure that your laptop's ACPI functions will be enabled. As with Fedora Core (1 at least) this kernel option is compiled to be off by default. Additionally, if you have a built-in CDRW drive and you're having problems writing to it, you may also want to add the hdX=ide-scsi option (where X is the device letter of your CDRW drive). Hopefully, many of these issues will be fixed in newer versions of Fedora Core and by the next release of Enterprise Linux.
Given the problems with floppy-based network kickstart installs, let's look at the CD option via the stock CD boot image boot.iso from our own CD 1's path Fedora/images/boot.iso.
| Note |
You can get this CD boot image boot.iso from one of the Fedora Core mirror sites if you don't have the Fedora stock install CDs handy. |
We're going to cover a couple of different ways of installing from a CD-an easy (stock) way and a not-so-easy (custom) way. The easy way is, well, easier for the admin upfront, but it forces the clients (or installer person) to type in special pointers to point to your centralized ks.cfg file(s) out on the network. The second, not-so-easy, way is cool because it requires no intervention from the install person at all (other than inserting a CD), but it takes a lot more footwork on your part.
First mount CD 1 and copy the stock boot.iso file from the Fedora/images/ directory:
   # cd /root
   # mkdir tmp ; cd tmp
   # cp -a /mnt/cdrom/images/boot.iso
Next, insert a blank CD-R into your burner. Since this is only a 3 to -4MB image file, I recommend using the small "business card" CD-Rs (more impressive too). Proceed to burn the boot.iso with the following command:
# cdrecord dev=0,0 /root/tmp/boot.iso ; eject
See the man page for cdrecord and use cdrecord -scanbus to see your CDR/W drive id number, or if more convenient, iso files can also be burned by Windows-based CDR burning software such as Nero.
If you try to burn your CD with cdrecord and get errors like this
   # cdrecord dev=0,0,0
   /var/ftp/pub/fedora/core/l/i386/os/images/boot.iso ; eject
   Cdrecord-Clone 2.01a19 (i686-redhat-linux-gnu) Copyright (C)
   1995-2003 Jrg Schilling
   scsidev: '0,0,0'
   scsibus: 0 target: 0 lun: 0
   Linux sg driver version: 3.1.25
   Error trying to open /dev/scd0 exclusively ... retrying in 1
   second.
   [...]
   Error trying to open /dev/scd0 exclusively ... retrying in 1
   second.
   Error trying to open /dev/scd0 exclusively ... retrying in 1
   second.
   bailing out..
then something else may have control of your CD-R device. Sometimes processes such as kscd or the like may have a hold on it. You can detect and kill such processes like this:
   # ps auxw|grep [k]scd
   tweeks 4187 0.0 4.1 24984 9272 ? S 15:09 0:00 kscd -session
   117f000001000107214522900000042380008_1080711996_7
   26640
   # killall kscd
   # ps auxw | grep [k]scd
Now your cdrecord session should work fine.
Next, try a test boot/install on a test client machine. When you get to the boot prompt, type
Boot: linux ks=http:// www.example.com/installs/ks-server.cfg ksdevice-eth0
substituting the http path where you've placed a copy of your ks-server.cfg file. (This is why it takes a bit more work on the client side. One typo by the client, and the install will fail to start.)
You can make things easier for the person doing the client side of the install by creating your own boot.iso disk with the http:// pointer built in. To do this, you need to have the boot CD automatically have its ks= pointer pointing out to your web server's ks files. The following instructions show you how to do that:
Mount the boot.iso image to some mount point (such as /mnt/tmp or even /mnt/cdrom):
#  mount -o loop,rw /root/fedora-core-1-boot.iso /mnt/tmp
#  is -la /mnt/tmp/isolinux
total 4257
drwxr-xr-x      2 root      root         2048 Nov 3 17:45 .
drwxr-xr-x      3 root      root         2048 Nov 3 17:45 ..
-r- r--r--      1 root      root         2048 Nov 3 17:45 boot.cat
-rw-r--r--      2 root      root          292 Nov 3 17:45 boot.msg
-rw-r--r--      2 root      root         1034 Nov 3 17:45 general.msg
-rw-r--r--      4 root      root      3012543 Nov 3 17:45 initrd.img
-r--r--r--      2 root      root         9428 Nov 3 17:45 isolinux.bin
-r-xr-xr-x      2 root      root          569 Nov 3 17:45 isolinux.cfg
-r--r--r--      2 root      root        84420 Nov 3 17:45 memtest
-rw-r--r--      2 root      root          788 Nov 3 17:45 options.msg
-rwr--r--r--    2 root      root          872 Nov 3 17:45 param.msg
-rw-r--r--      2 root      root          490 Nov 3 17:45 rescue.msg
-rw-r--r--      2 root      root          549 Nov 3 17:45 snake.msg
-rw-r--r--      2 root      root         6773 Nov 3 17:45 splash.lss
-r--r--r--      1 root      root         2880 Nov 3 17:45 TRANS.TBL
-rw-r--r--      4 root      root      1228344 Nov 3 17:45 vmlinuz
Copy all the files to a "scratch area" for editing:
#  cd /root
#  mkdir boot-iso-files
#  cp -a /mnt/tmp/* boot-iso-files/
#  umount /mnt/tmp
#  cd boot-iso-files/
#  cd isolinux/
#  ls
boot.cat    initrd.img   memtest     rescue.msg TRANS.TBL
boot.msg    isolinux.bin options.msg snake.msg vmlinuz
general.msg isolinux.cfg param.msg   splash.lss
| Note |
The isolinux.bin, initrd.img, and vmlinuz together are what boots the system here. The inslinux.cfg is like a lilo.conf file that you're going to edit to provide control over the automatic ks=... parameters. |
Edit the isolinux.cfg file down to this and add the bold bit (all on one line):
default linux
prompt 1
timeout 300            <--- Timeout in seconds before it starts
label linux
  kernel vmlinuz
  append initrd=initrd.img ramdisk_size=8192
     ks=http://example.com/installs/ks-server.cfg
     ksdevice=eth0

label memtest86
  kernel memtest
  append -
Include and change the boot message files if you want.
| Caution |
The append line and the two following lines should all be a single line. Allow it to simply wrap around the screen. Do not break the line. |
| Tip |
The memtest86 you see listed is a built-in hardware memory tester, one of the best out there for Linux. These CDs are also very useful for doing memory burn in tests. Remember this the next time you have some suspected bad RAM you need checked out. |
cd back one dir and make your new iso image to save out to my-server-boot.iso on your hard drive:
Insert a blank CD-R disc and burn your new boot.iso image to CD:
# ls -lah      my-server-boot.iso
-rw-r--r--   1 root   root         4.3M Feb 23 10:00 my-server-boot.iso
#  cdrecord dev=6,0 speed=6 my-server-boot.iso
When cdrecord finishes, you should be able to boot a test system from your new automated boot.iso disc. If your customized kickstart file is correctly located at http://example.com/installs/ks-server.cfg, as I had shared it out previously (or whatever URL/share you are using), then everything should autoinstall just fine with zero human intervention aside from inserting the CD and powering up.
| Tip |
These instructions just covered the bare essentials. You might want to spend a little extra time and create a network boot and install CD that can allow various install time options of using a server load, a desktop load, or a workstation load via different ks.cfg files-all located out on your http server via standardized symlink names. Then you can use the built-in menus (in isolinux.cfg) on the boot.iso to give the install person some more options, while you still centrally control what happens with each one of those loads from the ks.cfg links and files you have stored online at www.example.com/installs/. |