Samba is included with the Server installation option under Fedora Core and Red Hat Linux. It is usually included with server installation packages under other Linux distributions. The Samba package includes both the Samba server and the smbclient client. Once you have determined that the Samba packages exist on your system and have been installed properly, there are several ways to configure Samba for your network.
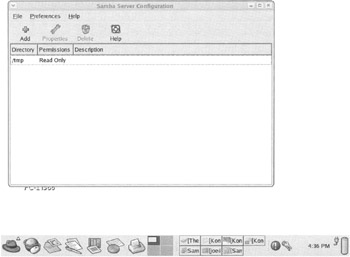
On a Red Hat Linux or Fedora Core system, click the Red Hat icon and select System Settings ⇨ Server Settings ⇨ Samba. The Samba configuration tool appears (Figure 15-1).
With this tool, you can define server settings including workgroups, descriptions, authentication modes, authentication servers, guest accounts, and whether or not to use encrypted passwords. You can also identify Samba users, and then identify which directories to share and who can share them.
This tool is easy to use and manages all the major components of a Samba configuration. However, you must be logged into the local machine in order to use it. If you need to manage Samba shares and configurations remotely, consider the SWAT Web tool described later in this chapter. You could also use X-based tools remotely if you have SSH configured to permit X forwarding.
As with most UNIX-based services, you can configure the Samba service by editing its configuration file, smb.conf. This file is usually kept in /etc/samba/smb.conf, though you may need to search for it if Samba installed it in a different directory on your system. Once the file is edited and saved, you can start the smb service.
The smb.conf file contains a number of sections:
[global]-The section that contains global parameters.
[homes]-The section used to share Linux user directories stored in \home.
[printers]-The section used to share all printers in the local Linux printing file /etc/printcap.
Note that the homes and printers sections are actually share definitions, not unique section types.
smb.conf also contains a number of local sections. Each of these sections defines the parameters for a specific share-a given directory or printer that can be used across the network. Though you can name these share definitions anything you want, the global, homes, and printers sections must retain their original names.
Unlike a lot of service configuration files, smb.conf is easy to use. It is well-commented and the various options are named clearly. Here, we show a simple smb.conf example (with comments removed). This example describes a computer that is sharing its music directory and all its printers with anyone on its LAN.
   [global]
   workgroup = CSTREET
   server string = Samba Server
   log file = /var/log/samba/%m.log
   max log size = 50
   security = USER
   load printers = Yes

   [Musicbox]
       comment = My music collection
       path = /usr/local/share/music
       guest ok = Yes

   [printers]
       comment = All Printers
       path = /var/spool/samba
       browseable = No
       guest ok = Yes
       printable = Yes
Note that in this file, the [global] section identifies the workgroup, sets a comment string identifying the server, sets the security level to SHARE, and loads all the printers named in /etc/printcap. The following sections share the /usr/local/share/music directory (for any user in read-only mode, such as a guest user) and define how all printers are shared on the Samba server.
Once you have saved the configuration file and exited the text editor, start (or restart) the Samba service with the following command:
| Note |
If smb fails to start, run the testparm command. It will tell you if anything is wrong with your smb.conf file. |
At this point you can go to a Network Neighborhood or My Network Places window on a Windows client machine, and see the shared directory and shared printers available from the Samba server.
The Samba Web Administration Tool, or SWAT, is available on most Linux systems that include the most recent Samba packages. One advantage of SWAT is that you can use it remotely to edit configurations or permissions (see the related sidebar, "Using SWAT Remotely"). To use this web-based Samba configuration tool, issue these commands as the root user:
   # chkconfig swat on
   # service xinetd restart
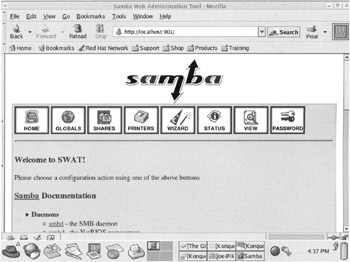
Then, from a web browser on the local system, type http://localhost:90l. The SWAT tool appears in the browser, as in Figure 15-2.
You can view the current smb.conf file in SWAT by clicking the View button in the top button bar. As you work with SWAT, use the View button periodically to see how the options you select are reflected in the actual smb.conf file.
To add a new share through SWAT, follow these steps:
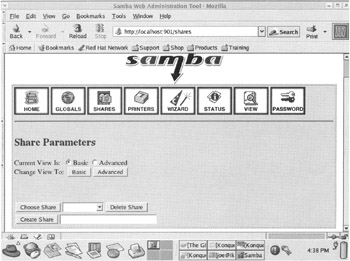
Click the Shares button. The Shares window appears (Figure 15-3).
In the Create Share box, enter the complete path name of the directory to be shared.
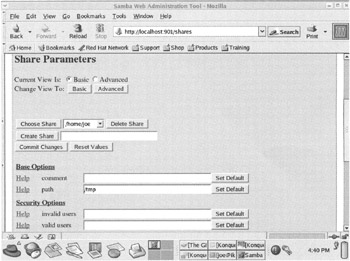
Click the Create Share button. The Share Parameters page appears (Figure 15-4).
Select the options you want to apply to the new share. These options affect the security and browsability settings of the share, and are described on the smb.conf manual page. You can also see a description of each parameter by clicking the Help link directly below its name.
Click the Commit Changes button to create the new share.
Verify the new share by clicking the View button and looking for the new section in smb.conf.
| Tip |
You can add printers in the same way, using the Printers button on the main SWAT page. |
You can also use SWAT to check the status of the three Samba server processes, smbd, nmbd, and winbindd. To do so, click the Status button. You can start, stop, or restart services from this tool as well. Note that winbindd is an optional daemon not required for basic sharing.
By default, SWAT is configured to be available only on the localhost machine (127.0.0.1). If you want to use SWAT to administer a remote machine, you must edit the file /etc/xinetd.d/swat. The default /etc/xinetd.d/swat file looks like this:
   # default: off
   # description: SWAT is the Samba Web Admin Tool. Use swat \
   #          to configure your Samba server. To use SWAT, \
   #          connect to port 901 with your favorite web browser.
   service swat
   {
           disable = no
           port            = 901
           socket_type     = stream
           wait            = no
           only_from       = 127.0.0.1
           user            = root
           server          = /usr/sbin/swat
           log_on_failure  += USERID
   }
In order to make SWAT available to a remote machine, you must edit the only_from line to include the IP address of the machine from which you plan to issue administrative commands. For example, if Samba is running on a machine with the IP address 192.168.0.55 and you want to administer it from a machine with the IP address 192.168.0.22, you would change the only_from line to read
only_from = 127.0.0.1 192.168.0.22
After you restart xinetd, the machine can be administered either locally or from 192.168.0.22 by typing http://192.168.0.55:901 into a browser.
Be careful with this feature. Any time you open xinet services up to remote access, you lower the overall system security. However, it's useful to have remote access to Samba services, so this is a security decision that you'll need to make based on local guidelines and need.
| Tip |
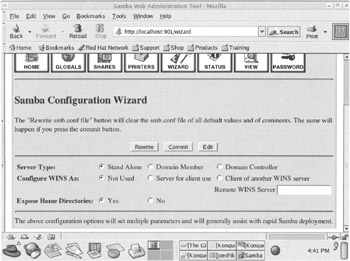
If you just need a simple Samba configuration and you don't want to pore over smb.conf to figure out what you need, click the Wizard button in SWAT. You'll see the Wizard page (Figure 15-5), which will guide you through the process. Once you set parameters on this page and click the Commit button, smb.conf will be changed to reflect your selections. |
If you need more help as you configure your Samba server, there are several ways to get additional information:
SWAT help-As you go through the SWAT administration tool to configure globals, shares, and printers, a Help link next to each option will take you to a description of that option.
SWAT current configuration-Click the View icon in SWAT to see the current version of the smb.conf file. Click the Full View button to see all the global defaults that are in place.
smb.conf man page-Type man smb.conf to see details about each setting in the smb.conf file.
/etc/samba/smb.conf file-The comments in the smb.conf file itself will help you fill out the entries correctly.
/usr/share/doc/samba - *directory-Contains a wealth of documentation about Samba.