If the security risks of FTP are simply too much for you to deal with, consider switching to the secure suite of tools distributed by OpenSSH. OpenSSH offers secure versions of all the old familiar remote access and transfer tools, like Telnet (replaced by ssh), FTP (replaced by sftp), and rcp (replaced by scp). The client and server for each of these tools is preconfigured so that it's ready to go as soon as you log in for the first time on most modern Linux distributions. OpenSSH tools are everywhere: Every version of Linux, Solaris, PalmOS, Mac OS X, and Windows all have functional ports and user clients.
| Note |
OpenSSH is installed by default on all Fedora Core server installations. If you choose another type of installation, you will need to install OpenSSH by hand before you can use it. |
OpenSSH tools are not just for logins and file transfers. They can even be used to make insecure protocols behave more securely in much the same way as SSL allows web traffic to travel safely between a browser and a server. In fact, many insecure protocols can be tunneled securely over a remote SSH to local SSH machine connection, including X11, POP3, Telnet, SMTP, rsync, and so forth.
Fedora Core gives you all the OpenSSH tools you need, straight out of the box. If you select the regular server installation, you'll see these packages on your system after installation is complete:
   # rpm -qa *ssh* | sort
   openssh-3.6.lp2-19
   openssh-askpass-3.6.lp2-19
   openssh-askpass-gnome-3.6.lp2-19
   openssh-clients-3.6.lp2-19
   openssh-server-3.6.lp2-19
You will have the base OpenSSH package, some password authentication programs for the X11 GUI environment, all the OpenSSH clients including ssh, scp, and sftp, and the OpenSSH server itself, sshd. Though you can start using the OpenSSH tools right away, it's best to spend a few minutes configuring sshd so that it does precisely what you want it to.
The sshd daemon takes its configurations from the /etc/ssh/sshd_config file. As you can see later, most of the file is commented out. If you read the comments in the configuration file, you'll realize that most of these options are the default-compiled settings, but the settings are left in the file for reference. If you want to change how sshd behaves on your system, just remove the hash marks to uncomment a setting, and then change the setting from its default-compiled setting. Read through the sample file to see some of our suggestions for change:
   $OpenBSD: sshd_confg.v 1.59 2002/09/25 11:17:16 markus Exp $

   # This is the sshd server system_wide configuration file See
   # sshd_config(5) for more information.

   # This sshd was compiled with
   # PATH=/usr/local/bin:/bin:/usr/bin

   # The strategy used for options in the default sshd_config
   # shipped with OpenSSH is to specify options with their
   # default value where possible, but leave them commented.
   # Uncommented options change a default value.

   #Port 22
   #Protocol 2,1
This default setting indicates that when sshd runs, it first offers sessions in SSH v 2 protocol to the connecting client, and then falls back to the SSH v1 protocol if required by the client. SSH 2 is more secure than the older version 1, and v1 has many known vulnerabilities. The only reason to run it is that some older ssh-based commercial packages require it. Don't run SSH v1 on your server. If you uncomment and edit this line, you can force your SSH daemon to offer only SSH v 2 to incoming clients. To do this, remove the hash mark and the trailing ,1 so that the line simply reads Protocol 2.
   #ListenAddress 0.0.0.0
   #ListenAddress   : :
By default, the sshd service binds to all IP addresses associated with your server. If sshd is running on a firewall or on a multi-LAN server, you might choose to remove the hash mark and change the line ListenAddress 0.0.0.0 to something like ListenAddress 10.1.1.1 to restrict SSH logins to a particular side of your network.
| Note |
This configuration file is longer and more complex than what you see here. We're showing you only the most commonly tweaked settings. |
   # HostKey  for protocol version 1
   #HostKey /etc/ssh/ssh_host_key
   # HostKeys for protocol version 2
   #HostKey /etc/ssh/ssh_host_rsa_key
   #HostKey /etc/ssh/ssh_host_dsa_key

   # Lifetime and size of ephemeral version 1 server key
   #KeyRegenerationInterval 3600
   #ServerKeyBits 768

   # Logging
   #obsoletes QuietMode and FascistLogging
   #SyslogFacility AUTH
   SyslogFacility AUTHPRIV
   #LogLevel INFO

   # Authentication:

   #LoginGraceTime 120
   #PermitRootLogin yes
   #StrictModes yes

   #RSAAuthentication yes
   #PubkeyAuthentication yes
   #AuthorizedKeysFile         .ssh/authorized_keys
The last two lines in the preceding code block enable key-based authentication. SSL, SSH, and other modern encryption methods use dual-key encryption, a method that requires both a public and a private key to encrypt and decrypt a secure session or data stream. If you turn on key-based authentication in sshd, you remove the username/password authentication step and allow access only with a known set of keys. This is not necessarily more secure, as it now ties security to the remote trusted host's own security. However, this setting is often the only viable solution if you need remote automation scripts and other back-end programs to log into systems without requiring a human to type in a password.
| Caution |
You probably should not enable key-based authentication unless you are in a provably secure environment AND you trust everyone on your LAN plus everyone who has access to the server AND your security honchos approve it as an acceptable security policy. |
   # rhosts authentication should not be used
   #RhostsAuthentication no
   # Don't read the user's ~ /.rhosts and ~ /.shosts files
   #IgnoreRhosts yes
   # For this to work you will also need host keys in
   # /etc/ssh/ssh_known_hosts
   #RhostsRSAAuthentication no
   # similar for protocol version 2
   #HostbasedAuthentication no
   # Change to yes if you don't trust ~ /.ssh/known_hosts for
   # RhostsRSAAuthentication and HostbasedAuthentication
   #IgnoreUserKnownHosts no

   # To disable tunneled clear text passwords, change to
   #no here!
   #PasswordAuthentication yes
   #PermitEmptyPasswords no

   # Change to no to disable s/key passwords
   #ChallengeResponseAuthentication yes

   # Kerberos options
   #KerberosAuthentication no
   #KerberosOrLocalPasswd yes
   #KerberosTicketCleanup yes

   #AFSTokenPassing no

   # Kerberos TGT Passing only works with the AFS kaserver
   #KerberosTgtPassing no

   # Set this to 'yes' to enable PAM keyboard-interactive
   # authentication
   # Warning: enabling this may bypass the setting of
   # 'PasswordAuthentication'
   #PAMAuthenticationViaKbdInt no

   #X11Forwarding no
   X11Forwarding yes
The X11Forwarding yes setting permits users to tunnel server-side X11 client programs and output over SSH to the local X11 GUI (called the local X11 server). That is, you could ssh into a remote system, start the Mozilla browser from the command line on the server, and get the GUI window for the Mozilla program running on the remote server "painted" on your local desktop X GUI. Imagine being able to run GNOME, KDE, and Linux applications off your Fedora Core machine while sitting in front of a Windows PC in a lab across the country, or running a system load graph for each of your servers on your local desktop. This is a powerful feature. It's safe to leave this function enabled, even if you never use it. Just be aware that you might get an unexpected window on your local machine if you're issuing commands over an ssh session.
   #X11DisplayOffset 10
   #X11UseLocalhost yes
   #PrintMotd yes
   #PrintLastLog yes
   #KeepAlive yes
   #UseLogin no
   #UsePrivilegeSeparation yes
   #PermitUserEnvironment no
   #Compression yes

   #MaxStartups 10
   # no default banner path
   #Banner /some/path
   #VerifyReverseMapping no

   # override default of no subsystems
   Subsystem       sftp    /usr/libexec/openssh/sftp-server
The final line in the file turns on the sftp subsystem of sshd. It is enabled by default in most modern Linux distributions. If you can get into your server via ssh, then you can probably access sftp resources with the sftp client as well.
Once you've determined that all the appropriate packages are on your system and made your basic sshd configuration file changes, it's time to check the server-side service. Everything you need to run OpenSSH services is managed by the sshd daemon. Verify that the daemon is running with the command
   #ps auxw|grep [s]shd
   root 3615   0.0 0.5 5100 1252 ? S 10:37 0:00 /usr/sbin/sshd
or the optional Red Hat command
   #/etc/init.d/sshd status
   sshd (pid 3615) is running...
If the daemon is running, you can use this command to stop and restart it in order to reload the changes in your config file:
   #/etc/init.d/sshd restart
   Stopping sshd:                             [ OK ]
   Starting sshd:                             [ OK ]
In fact, you can do this while connected to the server through an SSH connection, and never lose the session. Just another reason why OpenSSH tools are the new de facto standard for remote Linux/UNIX access.
Finally, you should ensure that sshd will come up when the machine is booted and when runlevels change. The easiest way to do this is with the init script control tool chkconfig. First, check the existing configuration for the sshd service:
   # chkconfig --list sshd
   sshd      0:off   1:off   2:on   3:on   4:on   5:on   6:off
Since most servers boot into runlevels 3 and 5 almost exclusively (on Red Hat-other distributions may use different runlevels), these settings are appropriate for almost all cases.
If you want to configure the server so that it will not run a service such as sshd at boot time, you can turn the service off in all runlevels like this:
# chkconfig sshd off
Check it again:
   # chkconfig  --list sshd
   sshd      0:off   1:off   2:off   3:off   4:off   5:off   6:off
| Note |
This shows that the service will be started when the server comes up into runlevels 2, 3, 4, or 5 (levels 0, 1, and 6 are for shutting down, single user or "safe mode", and rebooting, respectively). See Chapter 5 for more information on runlevels. |
When you're ready to configure it to be on at boot time again, use chkconfig to turn the service on and verify that the runlevels are correct (most network services are configured to come up in either 2-5 or 3-5):
   # chkconfig sshd on
   # chkconfig --list sshd
   sshd    0:off   1:off   2:on   3:on   4:on   5:on   6:off
| Note |
The chkconfig control tool only defines boot and runlevel settings for a given service or daemon when the entire system changes state (boots or changes runlevels). It does not start or stop a service in real time. If you need to make sure that sshd does not start after a reboot (set it to "off"), as well as stop the sshd service now running, then you should use this command sequence: |
# chkconfig sshd off
which will configure the daemon to be off at boot time or runlevel changes, and then run
   # /etc/init.d/sshd stop

   OR

   # service sshd stop
to gracefully shut down a running daemon, such as sshd, in real time (the latter is the optional Red-Hat-based init script usage). The opposite of these commands would be the usage of "on" and "start" respectively.
| Caution |
If you use the /etc/init.d/sshd stop option remotely over ssh, it will also end your session. The only way to get back into a system with a stopped sshd service like this would be to visit the machine physically, since you have turned off the service that provides access. |
You're fully configured and ready to go. How does scp work? Just like cp, or scp's older cousin rcp(remote copy), it works only through an encrypted network connection. For example, assume that the user bob wants to copy everything from his current desktop to a remote server at bobsdomain.org. In the current directory, he has the following files:
$ ls   -l
total   92
-rw-r--r--    1 root    root    1877 Dec 16 12:12 anaconda-ks.cfg
-rw-r--r--    1 root    root      98 Dec 17 06:33 fedora-desktop-update-
notes.txt
-rw-r--r--    1 root    root   49546 Dec 16 12:12 install.log
-rw-r--r--    1 root    root    5496 Dec 16 12:12 install.log.syslog
-rw-r- r--    1 root    root     512 Dec 16 11:50 ORIG-MBR.img
drwxr-xr-x    4 root    root    4096 Dec 21 22:50 PACKAGES
-r-xr-xr-x    1 root    root    4590 Dec 30 14:39 pcmcia-STOCK-INIT
-rw-r--r--    1 root    root     400 Dec 23 17:17 SYS-CHANGELOG.txt
Bob doesn't have much more than a few files and some subdirectories. To copy the files, he issues the following command:
$ scp * bob@mydomain.com:/home/bob/tmp/

The authenticity of host 'mydomain.com (127.0.0.1)' can't be established.
RSA key fingerprint is 7f:0d:1c:44:56:3d:1a:6d:67:03:e4:34:6f:5c:fc:d9.
Are you sure you want to continue connecting (yes/no)? yes
Warning: Permanently added 'mydomain.com' (RSA) to the list of known hosts.
At this point, Bob must confirm that he wants to save the public key from the remote machine. This will speed connection to this site in the future. The remote machine prompts for a password, and the file transfer begins:
   bob@mydomain.com's password:
   anaconda-ks.cfg                  100% 1877      4.8MB/s   00:00
   fedora-desktop-update-notes.txt  100%   98    385.8KB/s   00:00
   install.log                      100%   48KB   15.6MB/s   00:00
   install.log.syslog               100% 5496      8.5MB/s   00:00
   ORIG-MBR.img                     100%  512      1.1MB/s   00:00
   PACKAGES: not a regular file
   pcmcia-STOCK-INIT                100%  22KB     6.9MB/s   00:00
   SYS-CHANGELOG.txt                100% 400       5.5MB/s   00:00
Note that scp did not do a recursive copy, and rejected the PACKAGES subdirectory. So the files did not get copied. To do so, Bob must specify recursive scp when he issues the initial command:
   $ scp -rp * bob@mydomain.com:/home/bob/tmp
   bob@mydomain.com's password:
   anaconda-ks.cfg                    100% 1877     4.7MB/s   00:00
   fedora-desktop-update-notes.txt    100%   98   369.5KB/s   00:00
   install.log                        100%   48KB  15.6MB/s   00:00
   install.log.syslog                 100% 5496     8.1MB/s   00:00
   ORIG-MBR.img                       100%  512     1.2MB/s   00:00
   xf43sav-27t.tgz                    100%   33KB   1.6MB/s   00:00
   savage_drv.o                       100%   75KB   2.9MB/s   00:00
   scanModem                          100%  103KB   7.9MB/s   00:00
   ModemData.txt                      100% 9139     5.8MB/s   00:00
   ModemData.txt.2                    100%   17KB   8.8MB/s   00:00
   ModemDriverCompiling.txt           100%   22KB   6.9MB/s   00:00
   pcmcia-STOCK-INIT                  100%   22KB   6.9MB/s 00:00
   SYS-CHANGELOG.txt                  100%  400     5.7MB/s 00:00
In this instance, the contents of the PACKAGES subdirectory and the directory itself were also copied over.
| Note |
The second scp example used both the - - r (recursive) and - - p (permissions) switches. Remember that you adopt the username and UID of the remote user, but files retain your local permissions. If you're backing up a system and you want to preserve all user/group and UID/GID information, tar is probably a better solution. |
The scp tool is best for pushing and pulling files between system accounts and across networks, especially when the receiving user is going to adopt ownership of the files. One common use is to match scp with cron to push common system files, like /etc/hosts, nsswitch.conf, or resolv.conf, out to multiple machines on a network.
| Tip |
If you want to offer scp access but don't want to give shell access, consider scponly. It's a bash shell replacement for scp. Just install and then add it to /etc/shells as a valid shell choice. You can now give remote users access over scp and sftp without giving them login privileges and a command line over SSH. Learn more at www.sublimation.org/scponly/. |
In some cases, you may prefer to enable key-based authentication rather than require users to type username/password pairs at login. As explained above, key-based authentication can be quite handy. If used by itself, it is less secure; however, it is sometimes the only way to automate systems smoothly and remove human intervention from the process.
To turn on key-based authentication, open the /etc/ssh/sshd_config file and locate the line beginning with #RSAAuthentication. Make sure that it is commented out, and that the PubkeyAuthentication line is active and set to yes:
   #RSAAuthentication yes
   PubkeyAuthentication yes
   AuthorizedKeysFile     .ssh/authorized_keys
After you change the configuration file, you'll need to restart sshd:
   # /etc/init.d/sshd restart
   Stopping  sshd:                               [ OK ]
   Starting  sshd:                               [ OK ]
   #
Now, when the user Mike requests ssh access, sshd will look in /home/mike/.ssh /authorized_keys to see whether this person has an authorized public key that can be trusted as Mike's key. How did the key get into his ~/.sshd/authorized_keys file in the first place? Someone put it there, probably either Mike or his root administrator.
In order to work with key-based authentication, you must follow several steps. First, you need to generate a public/private key pair. Once you have a public key, you can put it into an ~/ .ssh/authorized_keys file (where ~ = /home/username/ ) so that you can access the account. To generate a key pair, follow this command sequence:
   $ ssh-keygen -t dsa -C "mike_home"
   Generating public/private dsa key pair.
   Enter file in which to save the key (/home/mike/.ssh/id_dsa):
   Enter passphrase (empty for no passphrase):
   Enter same passphrase again: <enter>
   Your identification has been saved in /home/mike/.ssh/id_dsa.
   Your public key has been saved in /home/mike/.ssh/id_dsa.pub.
   The key fingerprint is:
   f1:7b:a8:80:ca:6f:12:da:1f:87:e7:f9:6a:ab:98:36 mike_home
   [mike@localhost mike] $
   [mike@localhost mike] $ ls -la .ssh/
   total 20
   drwx------         2 mike     mike    4096 Jan 10 19:04 .
   drwx------         5 mike     mike    4096 Jan 10 18:55 ..
   -rw-------         1 mike     mike     672 Jan 10 19:04 id_dsa
   -rw-r--r--         1 mike     mike     599 Jan 10 19:04 id_dsa.pub
   -rw-r--r--         1 mike     mike     219 Jan 10 18:58 known_hosts
The output of ls --la.ssh/ shows the user Mike's private and public (.pub) dsa-based key files on his home machine. Assume that Mike needs to log into the remote system at work mydomain.com, and do so without a password. In order to do this, Mike's home public key needs to be placed in his ~/.ssh/authorized - keys file on the remote machine at work. First, from home, Mike prints his home dsa public key file to the screen:
   [mike@localhost mike]$ cat .ssh/id_dsa.pub
   ssh-dss
   AAAAB3NzaC1kc3MAAACBAPW0CP1/hI2gE/2Uk1lcaFPIvGC3DfCwHTP0x0NRJv5u
   Aws6W29pFp6yZc91vnBbnBbC0aN33DCZkMwfpFp08Y0QB0fpR8SRTXhTIVuC+Z2bTBM
   RZoWkEo9ZSA0ZG4Ro02fm21Mr6ez2b6/NXoyp4CzZeDgreC7IWTNv0qWLjD+yiUr
   AAAAFQDvC1cZ5P/i8g3cGEUqNEMxuif4JQAAAIBGBshp6bsM1be3VsTlDmBiCH+s
   XH6l1HSufcaflIL2GtQUyoTp8DGX0+JP7Uhk0XVlTBZfj6dx5h5GBQTzvbpUWafW
   UkVxad/ahS6mg1YQASgjUgI3rulz93xQoT6hkgEt90dIA1i6Axt/ajHK2E+wGsia
   S6CC876aQUTF5GUP1gAAAIEA8asyusN+QdTtjbEnCjtKkHEFZ2h+SDex6i4I+VUc
   XNCa7gILLj303N28WNz3fCDxDi0gr6wTlGD2Edm/1nfQ+IAzN+McRQupLjVM02MK
   e09XqeIw/+6XH8UDW4J/dFVq7eKaSTZt3mr92XdG5xipU/VddA4k2qKwq6m8UpxA
   knI= mike_home
| Tip |
Notice the comment at the end that identifies this key as mike_home. This is a very useful trick, as it is nearly impossible to identify keystrings merely by reading them. It's wise to create separate public keys for work, home, laptops, and so on; the more keys you use, the more you need to keep them clearly marked. |
Mike then highlights the public key with his mouse and copies the text. Next, Mike uses ssh to log into his remote account at work (a password is still required at this point):
   [mike@localhost mike]$ ssh mike@mydomain.com
   bob@mydomain.com's password:
Next, Mike edits his remote ~ /.ssh/authorized_keys file, or creates it if it does not exist:
[mike@mydomain.com mike]$ vi .ssh/authorized_keys
| Note |
Notice how the prompt changes from Mike's home [mike@local host mike]$ to [mike@mydomain.com mike]$ at his work account. |
Mike now pastes the copied text of his public key, saves the file, and exits the text editor. His account now looks as follows:
   [mike@mydomain.com mike]$  ls -la  .ssh/
   total 24
   drwx------     2 mike   mike    4096 Jan 10 19:35 .
   drwx-----x     6 mike   mike    4096 Jan 10 19:35 ..
   -rw-rw-r--     1 mike   mike     602 Jan 10 19:35 authorized_keys
   -rw-------     1 mike   mike     668 Jan 10 19:34 id_dsa
   -rw-r--r--     1 mike   mike     603 Jan 10 19:34 id_dsa.pub
   -rw-r--r--     1 mike   mike     223 Jan 10 18:36 known_hosts
The files look right, but the permissions are wrong. Both the authorized_keys file and the id_dsa (private key) should be readable only by the user who owns them. Use chmod authorized_keys to fix this:
   [mike@mydomain.com mike]$ chmod 700 .ssh/authorized_keys
   [mike@mydomain.com mike]$ Is   -la   .ssh/
   total 24
   drwx------     2 mike     mike         4096 Jan 10 19:35 .
   drwx-----x     6 mike     mike         4096 Jan 10 19:46 ..
   -rwx------     1 mike     mike         602 Jan 10 19:35 authorized_keys
   -rw-------     1 mike     mike         668 Jan 10 19:34 id_dsa
   -rw-r--r--     1 mike     mike         603 Jan 10 19:34 id_dsa.pub
   -rw-r--r--     1 mike     mike         223 Jan 10 18:36 known_hosts
| Note |
This is probably the most common problem with key-based authentication. Both the authorized_keys file and the .ssh directory should be set to rwx------ (700). If you don't chmod them both to 700, sshd will simply ignore one or both, and key-based authentication won't work. |
Mike logs out of his remote work machine and then logs back in to see if the authorized_keys entry worked. If login no longer requires a password, then the key-based ssh authentication is working:
   [mike@mydomain.com mike]$ exit
   [mike@localhost mike]$
   [mike@localhost mike]$ ssh mike@mydomain.com
   [mike@mydomain.com mike]$
With this in place, Mike can now automate almost anything between his home and work account, whether it's pushing web content, bookmark files, or daily logs.
| Note |
While this will allow Mike to easily push things to work, or pull them back home from work (using ssh, scp, or sftp), this will not allow the mike user at work (mydomain.com) to automatically push things home, or pull things from home to work. To do this, Mike would also need to put his work public key in his home's ~.ssh/authorized_keys file. |
For example, Mike might set up a regular job that copies web content from his home machine to his work machine. The following crontab entry will tar-gzip Mike's home web content
every Sunday at 1:37 A.M. and scp it to his work's ~/BACKUPS/ directory:
   37 1 * * 1 tar czvf ~ /mike-web_backup_$(date +%Y-%m-%d).tgz ~ /web
         && scp -p ~ /mike-web_backup_$(date +%Y-%m-%d).tgz
         bob@mydomain.com:~ /BACKUPS/
One of the nice things about OpenSSH's SSH suite is that users can use whichever client they prefer: scp, sftp, or ssh. You don't need a GUI client at all. For example, the stock OpenSSH command line sftp client works perfectly:
   $ sftp mike@mydomain.com
   Connecting to mydomain.com...
   sftp>
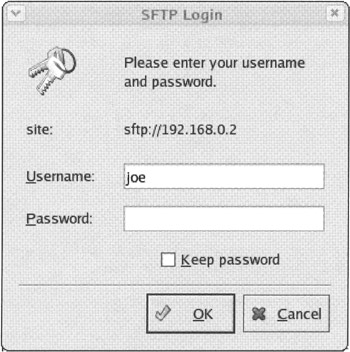
When you installed the complete OpenSSH suite as part of the server installation, the openssh-clients package was included. It includes all the command-line clients. However, you and your users aren't limited to command-line clients. Both GNOME and KDE offer a number of GUI tools and clients that work with and use OpenSSH. For example, if you point KDE's Konqueror web browser to the URL sftp://mydomain.com and you don't pass key-based authentication, a login window automatically pops up (Figure 18-1).
Table 18-1 shows some popular clients for scp and sftp. No matter the platform they use, your do users have some choice.
|
Windows |
WinSCP (scp and sftp) http://winscp.sourceforge.net/eng/about.php WS-FTPPro (sftp) www.ipswitch.com/Products/WS_FTP/features.html PuTTY (SSH, scp, and sftp) |
|
UNIX/Linux |
Konqueror (sftp) GFTP (scp and sftp) |
|
Mac OS X |
Fugu (sftp) http://rsug.itd.umich.edu/software/fugu Rbrowser (scp and sftp) |
If the sshd daemon is running and you can't get in with ssh, sftp, or scp, you may have selected install-time firewall configurations that lock the box down to the point where it can't be used as a server. While it's always good to start as securely as possible and then grant access, a server machine needs some freedom in order to do its work. You can see whether you inadvertently blocked SSH sessions by asking iptables what rules it is running:
# iptables -L
Chain INPUT (policy ACCEPT)
target     prot opt source               destination
RH-Firewall-1-INPUT  all  -- anywhere             anywhere

Chain FORWARD (policy ACCEPT)
target     prot opt source               destination
RH-Firewall-1-INPUT all --  anywhere            anywhere

Chain OUTPUT (policy ACCEPT)
target     prot opt source               destination

Chain RH-Firewall-1-INPUT (2 references)
target     prot opt source      destination
ACCEPT     all  --  anywhere   anywhere
ACCEPT     icmp --  anywhere   anywhere             icmp any
ACCEPT     ipv6-crypt--  anywhere    anywhere
ACCEPT     ipv6-auth--  anywhere     anywhere
ACCEPT     all --   anywhere   anywhere    state RELATED,ESTABLISHED
ACCEPT     tcp --   anywhere   anywhere    state NEW tcp dpt:http
REJECT     all --   anywhere   anywhere    reject-with icmp-host-prohibited
Since there are no ACCEPT rules for SSH/port22 connections in this output, your SSH connections are being killed by the final line (REJECT all). This is a very secure setup, but it defeats the purpose of the server. To get your SSH connections working, you need to edit the /etc/sysconfig/iptables file (on Red-Hat-based systems) and insert the iptable rule for ssh so that it looks like this:
   ...
   Chain  RH-Firewall-1-INPUT (2 references)
   target      prot opt source         destination
   ACCEPT      all  --  anywhere       anywhere
   ACCEPT      icmp --  anywhere       anywhere     icmp any
   ACCEPT      ipv6-crypt-- anywhere   anywhere
   ACCEPT      ipv6-auth-- anywhere    anywhere
   ACCEPT      all -- anywhere         anywhere     state  RELATED,ESTABLISHED
   ACCEPT      tcp -- anywhere         anywhere     state NEW tcp dpt:http
   ACCEPT      tcp -- anywhere         anywhere     state NEW tcp dpt:ssh
   REJECT      all -- anywhere         anywhere     reject-with icmp-host-prohibited
The second line from the bottom shows that SSH is now a trusted protocol from anywhere. You must now restart the iptables service. When it restarts, people should be able to connect through SSH.
| Tip |
For a more friendly version of this configuration on all Red-Hat-based systems (including Fedora Core), type redhat-config-securitylevel to get the GUI configuration tool. Check the box next to SSH, and click OK to enable this ruleset change. The new rule will be saved to /etc/sysconfig/iptables, implemented, and will be loaded and used after all reboots. |