| [ Team LiB ] |
|
Working with jCOM ToolsBeyond some initial configuration done on WebLogic Server, most of the actual work you'll do will involve the jCOM-provided tool programs. These programs lie at the heart of jCOM and are used to generate and deploy all the elements you'll need to expose individual objects between platforms. We'll go over four programs (some come with both a GUI and command-line version) in detail.
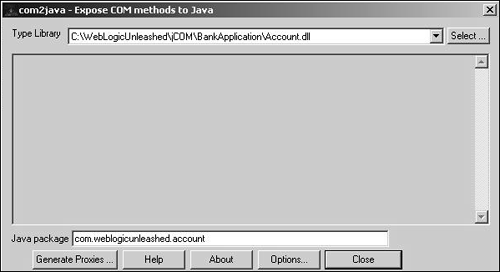
NOTE The examples section of this chapter contains working examples of each of these tools. Connecting to COM with com2javaThis tool is used to generate the individual Java proxy code modules that you'll need to access COM components. Think of it as making "COM available 2 Java"; that is, making COM components available to Java clients. All COM objects have type libraries associated with them in one form or another which, among other things, define the interfaces and classes contained within the component. The location of the associated type library for a particular component might not always be that easy to find, however. That's because type libraries (the file extension .tlb or .olb denotes a type library) might be embedded within other files such as DLLs or, as in the case of Visual Basic, in the executable itself. After you locate the type library that defines the COM component you want to expose, you'll want to feed this into com2Java to generate the Java classes you need from the other end. The tool will scan the library looking for any enumerations, COM interfaces, and COM classes it can find. Let's take a look at the classes you will see coming out of this tool. For every enumeration found, a Java interface will be generated containing constant declarations for items in the enumeration. For each COM class found, a corresponding Java class will be generated with the same name as the COM class. These are the classes that your client programs will typically invoke. COM has a type of interface called an automation interface that we're interested in. It allows an object to publish a list of properties and functions at runtime. This is the IDispatch interface we spoke of earlier and it is used with late binding. When using early binding, the properties and methods of an object are made available at compile time via the VTBL. The tool will generate a Java interface and a Java class for each interface found in the type library. The name of the generated Java interface will be the same as the COM interface. The name of the Java class will be the same as the COM interface with Proxy appended to the end of it. For example, if you have a COM interface named WindowsHelper, the Java interface will also be WindowsHelper, and the implementation class (which implements this interface) will be named WindowsHelperProxy. As you might expect, the generated Java interface will map the COM interface into a Java recognizable format with a subsequent Java proxy class generated that will be used to access COM objects that implement the interface. We earlier described com2java as making "COM available 2 Java"; well, there's actually more to it. In addition, the generated Java class can also be used by COM components to access methods in Java objects that implement this interface. Use of com2java in this way represents a special use of the tool. Why is it called com2java? It is a simple way for us to remember the main purpose of the tool, especially in relation to its alter ego, java2com, which we will talk about next. There is a GUI version (see Figure 33.6) as well as a command-line version of this utility. They can be found in the \bea\weblogic81\server\bin directory as com2java.exe and com2javacmd.exe, respectively. To examine a working example of this tool, see the bank account example found later in this chapter. Figure 33.6. Exposing COM objects via the com2java tool.
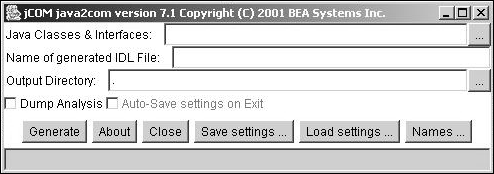
Connecting to Java with java2comThis tool is used to generate the elements required to expose Java objects to COM clients. Think of it as making "Java available 2 COM"; that is making Java objects available to COM clients. java2com uses Java's reflection API to analyze the Java classes you intended to make available to COM clients. It creates a COM IDL (Interface Definition Language) file, which is compiled by the Microsoft MIDL compiler to create a type library for the COM client and additional wrapper classes used by jCOM to facilitate early binding (vtable) access to Java objects. It does this analysis recursively, working its way through each of the classes and interfaces used in parameters or fields of every class until all the Java classes and interfaces accessible in this manner have been analyzed. If you need to automate the process, you can use the command-line version of java2com to run the tool from within a batch file or possibly an Ant build script, as we'll do in the inventory item example. If so, you'll create a java2com.xml file (containing information about the classes you want to process), which you'll specify as a parameter on the command line. The GUI version is depicted in Figure 33.7. Figure 33.7. Exposing Java objects via the java2com tool.
NOTE To run this utility, go to a command prompt and run \bea\weblogic81\server\bin\setWLSEnv.cmd to set up the environment. Then run \bea\weblogic81\server\bin\java2com.bat to invoke the tool. You'll have a chance to use this tool in the Inventory Item example found later in this chapter. NOTE A potential conflict arises when the server hosting the Java object and the client making calls to it are on different machines. Wrapper files that come out of java2com are compiled and go on the server. The IDL file that comes out of java2com is compiled by the MIDL compiler to create a type library and goes on the client. Depending on where you run the java2com tool, you'll have to redistribute these files to the correct location. Wrappers to a location on the server are made accessible via the classpath of the WebLogic Server, and the type library to the client must be registered in the client machine's registry through the regtbl tool. On each invocation of the java2com tool, a unique identification stamp is embedded into all the files it creates. The stamp serves to link the files together and is required for communication between them to be successful at runtime. You can not run the java2com tool to produce wrapper files and then later run it again to create an IDL file. Whether it is done on the client or the server is not important; what is important is that it is done at the same time. Of course, the consequences of this are that if you make any changes to the Java object you're exposing, you'll have to regenerate all the wrappers and the type library from scratch and redistribute them to their proper locations. JVM Registration via the regjvm ToolWhen COM clients make calls to jCOM exposed Java objects, they need some means of determining exactly where the Java objects they're calling are located. The way they do this is by looking up the required information in the Registry. You use the regjvm tool to place an entry in the client machine's Registry that references the Java virtual machine where the Java objects you're exposing will reside. The regjvm tool can be used to create and manage all such JVM references on a machine. In the "Deciding on the Right jCOM Environment Setup" section of this chapter, we learned about the three different setup modes for jCOM: DCOM, native in process, and native out of process. We discussed the distinct advantages and disadvantages they have in relation to one another and the inherent tradeoffs found in each. When you've made the decision on what mode best fits your application, you use the regjvm tool to manage this configuration on the client machine. There is a GUI and command-line version of this utility and both can be found in the \bea\weblogic81\server\bin directory as regjvm.exe and regjvmcmd.exe, respectively. You can invoke the GUI tool simply by clicking on it in Windows Explorer. For the command-line version, start a command shell and then invoke \bea\weblogic\81\server\bin\setWLSEnv.cmd to set up the environment correctly. You then can run the command-line version of this utility with the following syntax: - regjvmcmd.exe serverName IPAddress[PortNumber] where serverName is the WebLogic Server name, IPAddress is the IP address of the machine, and PortNumber is the port the server is listening on. NOTE When you use the regjvmcmd tool to enter a new JVM with a name that already exists in the Registry, such as when you want to change the hostname or port of the machine where the JVM resides, the regjvmcmd tool will not overwrite the original entry. If this is the case, you'll have to unregister the old JVM reference first and then reregister it with the new hostname and port changes. You can do this through the GUI tool or at the command line. The command line syntax is
regjvmcmd.exe /unregister serverName
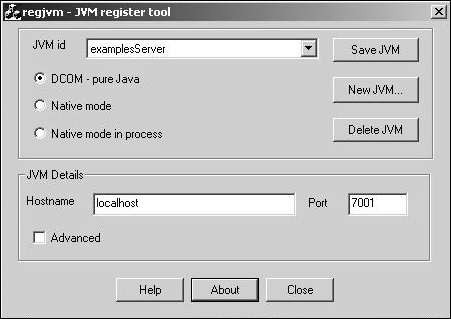
The GUI version of this tool also can be used to accomplish the same results, as depicted in Figure 33.8. Figure 33.8. Registering the JVM via the regjvm tool.
regtlbThis tool comes into use when a COM client calls a Java object through the early binding method. As you recall, early binding is when the COM client has access at compile time to the elements of the Java server object by way of scanning a local type library that you've created for the Java server object being called. This type library is produced by the java2com tool, which creates an IDL file that is in turn compiled by the Microsoft MIDL compiler. The resulting type library must be registered in the client machine's Registry so as to be available to the COM client making the call. This is where the regtlb tool comes in. You use it to register the associated type library for the Java server object in the client machine's Registry and link it to the JVM where the object will reside. The jCOM runtime engine will also use this information for linking type library defined object calls to the appropriate wrapper classes on the server. There is only a command-line version of this utility, and it can be found in the %WEBLOGIC_HOME%\server\bin directory as regtlb.exe. Figure 33.9 shows an example of regtlb. The syntax of the command is regtlb.exe typeLibrary.tlb aRegisteredJVM regtlb.exe /unregisterall Figure 33.9. Registering type libraries with regtlb.
You can use regtlb /unregisterall to have the regtlb tool unregister any previously registered type library versions. A demonstration of the use of this tool is provided in the inventory item early binding example later in this chapter. NOTE If the type library you're using was not created by a java2com-generated IDL file, you'll be prompted to give the name of the Java class that is to be instantiated for each COM class. When the type library is created via the java2com tool, regtlb can automatically determine the Java class name that corresponds to each COM class in the type library. The COM class descriptions in the type library will be of the form Java class java.util.Observable. Additional information about individual parameters found in the jCOM tools can be found in the BEA WebLogic Server Programming jCOM Manual available at http://e-docs.bea.com/wls/docs81/jcom/index.html. |
| [ Team LiB ] |
|